babal deal
Get unlimited web hosting for just रू 1999/year. Order Now

How to use custom domain with Blogger?
July 03, 2021
12:43 pm
Have a domain registered with us and want to connect it to Blogger and not sure how?
Take a deep breath, it's easy - and we'll guide you along the way to get this done.
You'll first need to register a domain if you haven't already - you can do so by searching for your dream domain from here and registering it first:
https://clients.babal.host/cart.php?a=add&domain=register
Once you have the domain registered, you will need to login to the domain management interface with us which would be as here:
https://domains.babal.host/login
Video for connecting custom domain with blogger:
Blog for connecting custom domain with blogger:
The login detail to this one is different from the one from the client area. So, for the first time, click on "Forgot password?". In the screen that follows - enter your email address in the field that you have registered an account with us at and then click on "Send Reset Link" as shown below:
 You'll receive an email like below:
 The email might take a few minutes to be delivered - so please be patient. Do not forget to check it in spam if you haven't received it for a while.
Click on the link included in the email.
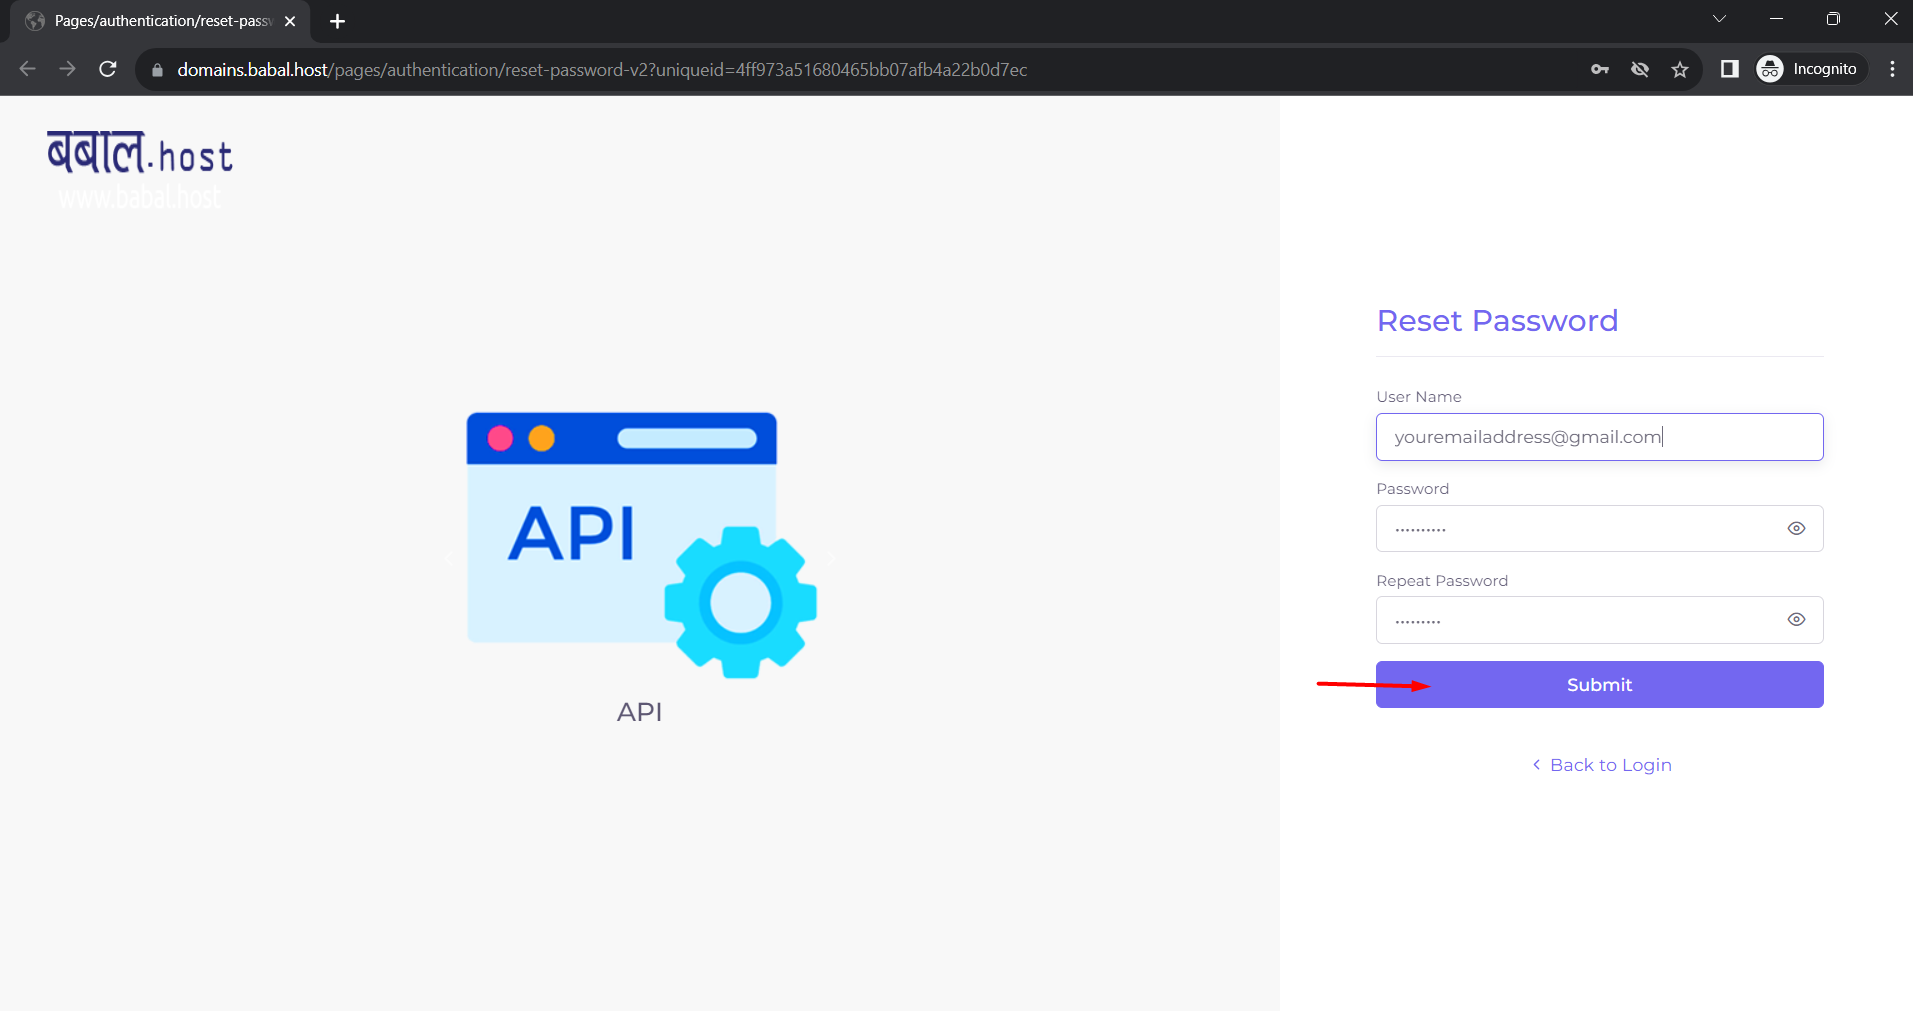
From the link that opens, enter the email address that you have used, and the password that you want to use for the account. You'll need to enter the same password twice to confirm. Click on "Submit" to confirm the change.
The email might take a few minutes to be delivered - so please be patient. Do not forget to check it in spam if you haven't received it for a while.
Click on the link included in the email.
From the link that opens, enter the email address that you have used, and the password that you want to use for the account. You'll need to enter the same password twice to confirm. Click on "Submit" to confirm the change.
 Once confirmed, you will be redirected to the login page - enter your email address and password that you just set and click on "Sign In" to get into your account.
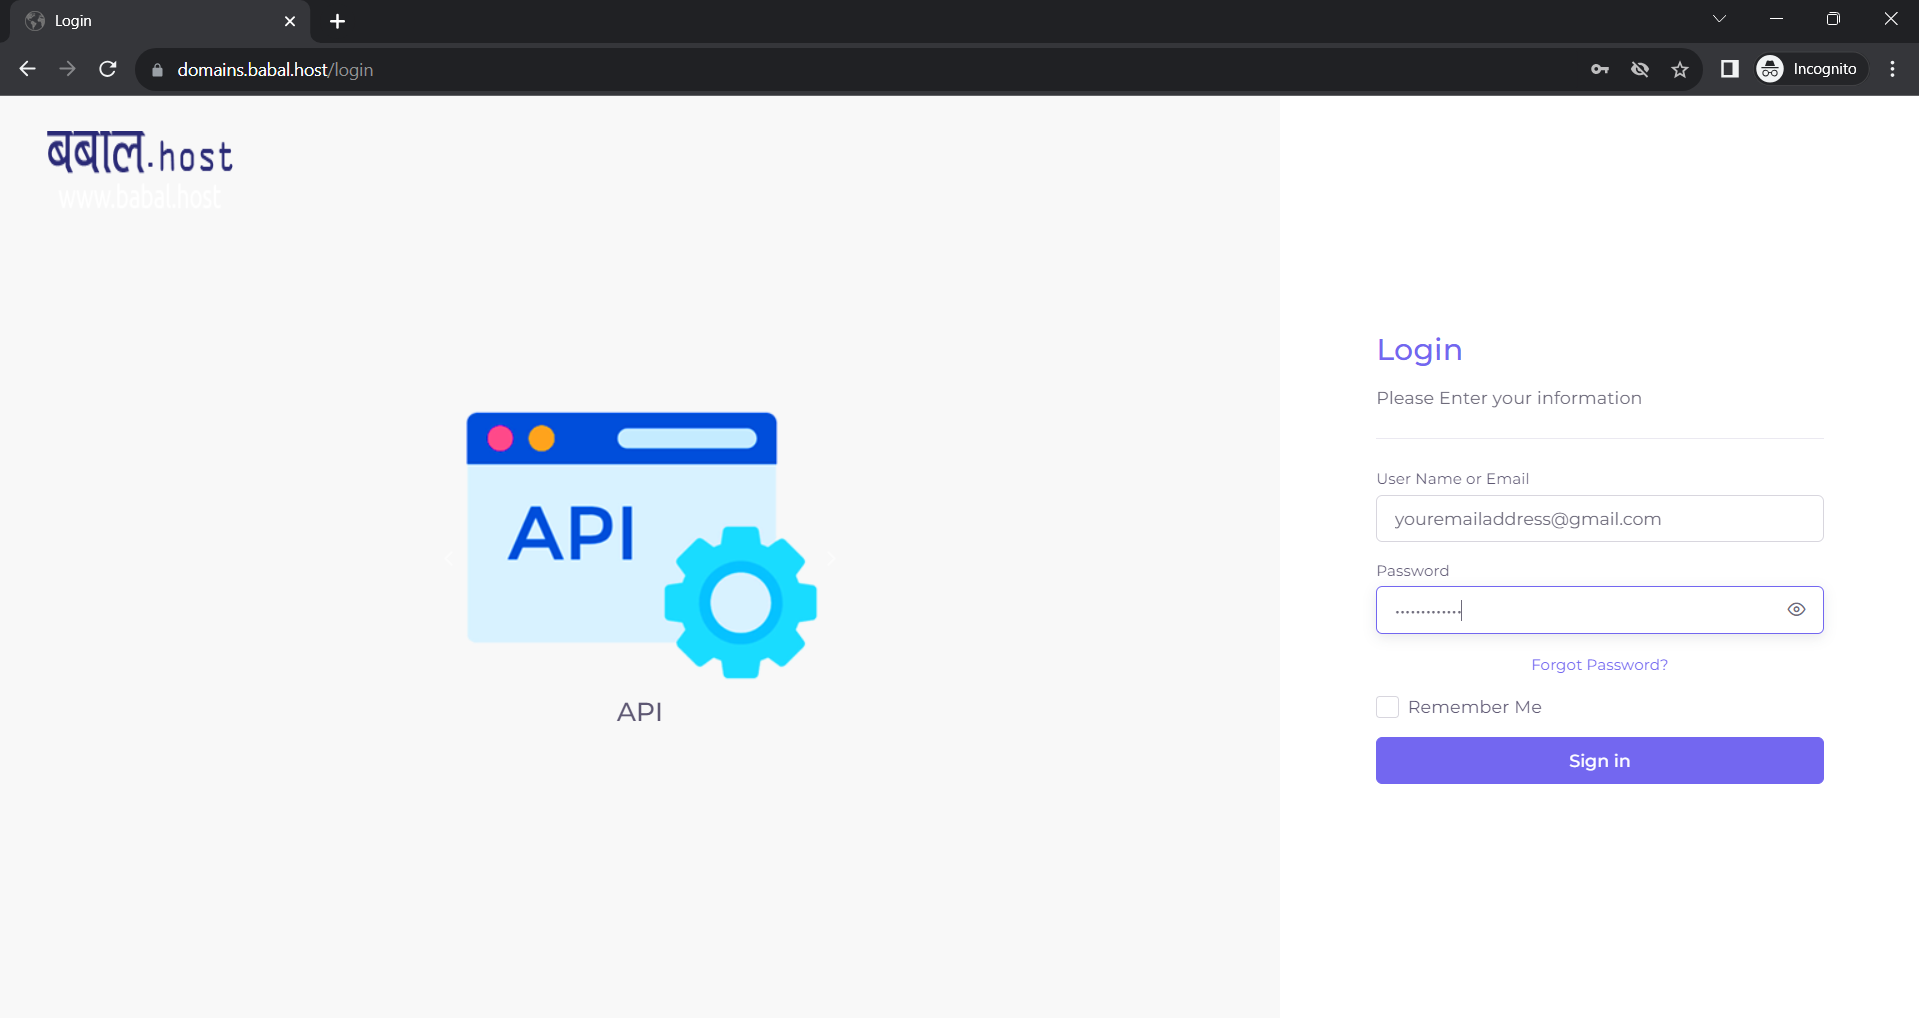 In the interface, you will find all the domains registered under your account with us. Click on the domain name you want to manage. For demonstration purposes - we're doing this for "babalguru.com"
Click on "DNS Management Panel" for the domain and then click on "Configure Now"
In the interface, you will find all the domains registered under your account with us. Click on the domain name you want to manage. For demonstration purposes - we're doing this for "babalguru.com"
Click on "DNS Management Panel" for the domain and then click on "Configure Now"
 The domain zone records are managed from where the domain is pointing at. So, you will need to set the domain nameserver to that of the domain registrar to be able to use the DNS management option. So, click on "Fix Name Servers Automatically" to change the nameservers as shown below:
 Once you do so - the nameservers for the domain are automatically changed and anything you set under "DNS Management Panel" would go into effect.
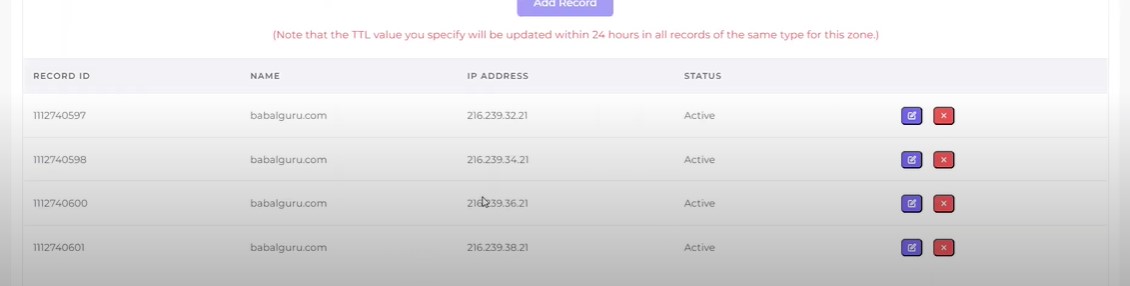
To properly connect to blogger - you will need to add 4 A-records and 2 CNAME records. The 4 A-records are always the same and so is 1 CNAME record. The remaining CNAME record is unique to each domain.
List of A-records to add
216.239.32.21
216.239.34.21
216.239.36.21
216.239.38.21
All these records need to be pointing to your main domain so this is how you add them:
Once you do so - the nameservers for the domain are automatically changed and anything you set under "DNS Management Panel" would go into effect.
To properly connect to blogger - you will need to add 4 A-records and 2 CNAME records. The 4 A-records are always the same and so is 1 CNAME record. The remaining CNAME record is unique to each domain.
List of A-records to add
216.239.32.21
216.239.34.21
216.239.36.21
216.239.38.21
All these records need to be pointing to your main domain so this is how you add them:
 Similarly, add the remaining 3 records - this is how the interface would look like as you add them all:
 The other record that you need to add is two CNAME records so click on "CNAME" from the top in the DNS Management panel and enter the records as required.
List of CNAME records to add
www => ghs.google.com [This is same for all the sites with blogger]
ukdsxx7ohscv => gv-hevdfoqdd3ukx5.dv.googlehosted.com [This is unique with all the sites - see step 4 in the below section "On the Blogger side" to know this record]
This is how you can add the CNAME record:
The other record that you need to add is two CNAME records so click on "CNAME" from the top in the DNS Management panel and enter the records as required.
List of CNAME records to add
www => ghs.google.com [This is same for all the sites with blogger]
ukdsxx7ohscv => gv-hevdfoqdd3ukx5.dv.googlehosted.com [This is unique with all the sites - see step 4 in the below section "On the Blogger side" to know this record]
This is how you can add the CNAME record:
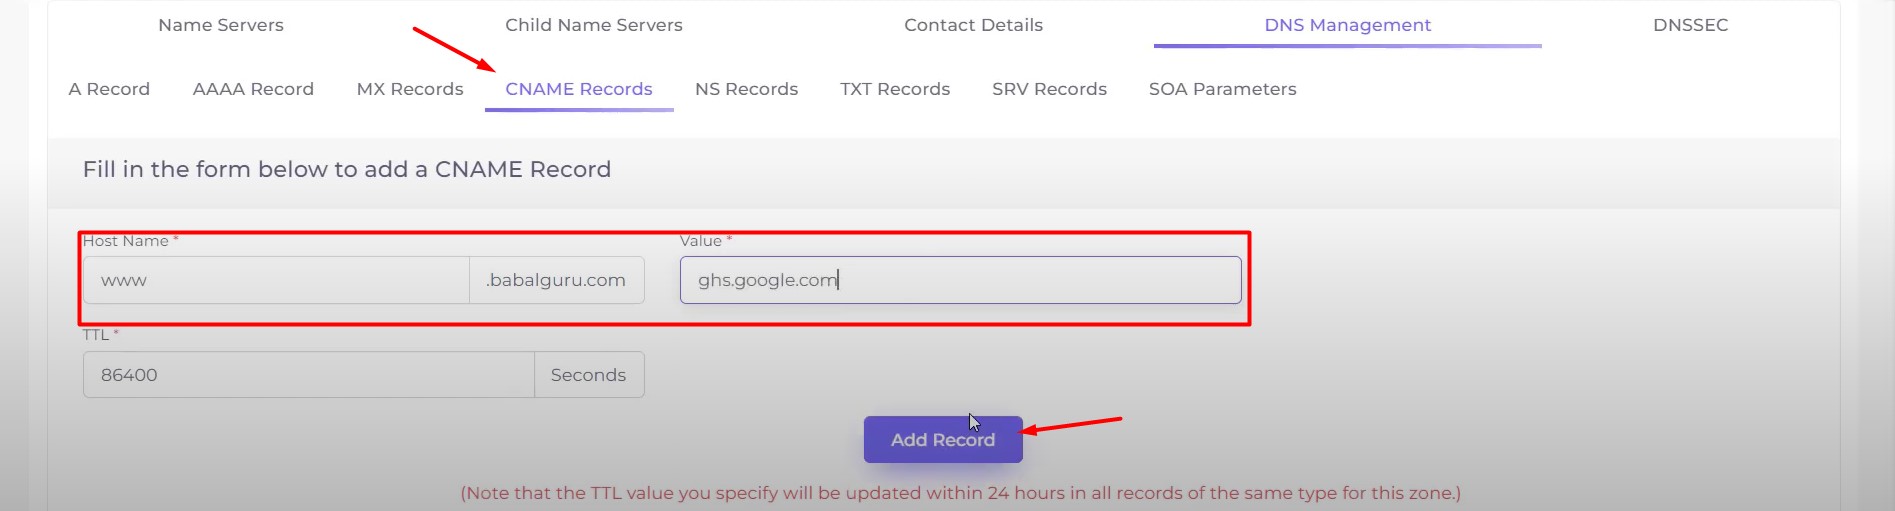 Similarly, add the second record as well.
Please allow few minutes to some hour for the records to fully resolve. You can use tools like this to check and see what's the propagation status for the record:
https://www.whatsmydns.net/?utm_source=whatsmydns.com&utm_medium=redirect
Similarly, add the second record as well.
Please allow few minutes to some hour for the records to fully resolve. You can use tools like this to check and see what's the propagation status for the record:
https://www.whatsmydns.net/?utm_source=whatsmydns.com&utm_medium=redirect
You'll receive an email like below:
The email might take a few minutes to be delivered - so please be patient. Do not forget to check it in spam if you haven't received it for a while.
Click on the link included in the email.
From the link that opens, enter the email address that you have used, and the password that you want to use for the account. You'll need to enter the same password twice to confirm. Click on "Submit" to confirm the change.
Once confirmed, you will be redirected to the login page - enter your email address and password that you just set and click on "Sign In" to get into your account.
In the interface, you will find all the domains registered under your account with us. Click on the domain name you want to manage. For demonstration purposes - we're doing this for "babalguru.com"
Click on "DNS Management Panel" for the domain and then click on "Configure Now"
The domain zone records are managed from where the domain is pointing at. So, you will need to set the domain nameserver to that of the domain registrar to be able to use the DNS management option. So, click on "Fix Name Servers Automatically" to change the nameservers as shown below:
Once you do so - the nameservers for the domain are automatically changed and anything you set under "DNS Management Panel" would go into effect.
To properly connect to blogger - you will need to add 4 A-records and 2 CNAME records. The 4 A-records are always the same and so is 1 CNAME record. The remaining CNAME record is unique to each domain.
List of A-records to add
216.239.32.21
216.239.34.21
216.239.36.21
216.239.38.21
All these records need to be pointing to your main domain so this is how you add them:
Similarly, add the remaining 3 records - this is how the interface would look like as you add them all:
The other record that you need to add is two CNAME records so click on "CNAME" from the top in the DNS Management panel and enter the records as required.
List of CNAME records to add
www => ghs.google.com [This is same for all the sites with blogger]
ukdsxx7ohscv => gv-hevdfoqdd3ukx5.dv.googlehosted.com [This is unique with all the sites - see step 4 in the below section "On the Blogger side" to know this record]
This is how you can add the CNAME record:
Similarly, add the second record as well.
Please allow few minutes to some hour for the records to fully resolve. You can use tools like this to check and see what's the propagation status for the record:
https://www.whatsmydns.net/?utm_source=whatsmydns.com&utm_medium=redirect
On the Blogger side
- Login to your blogger account
- Click on Settings from the left-hand side menu
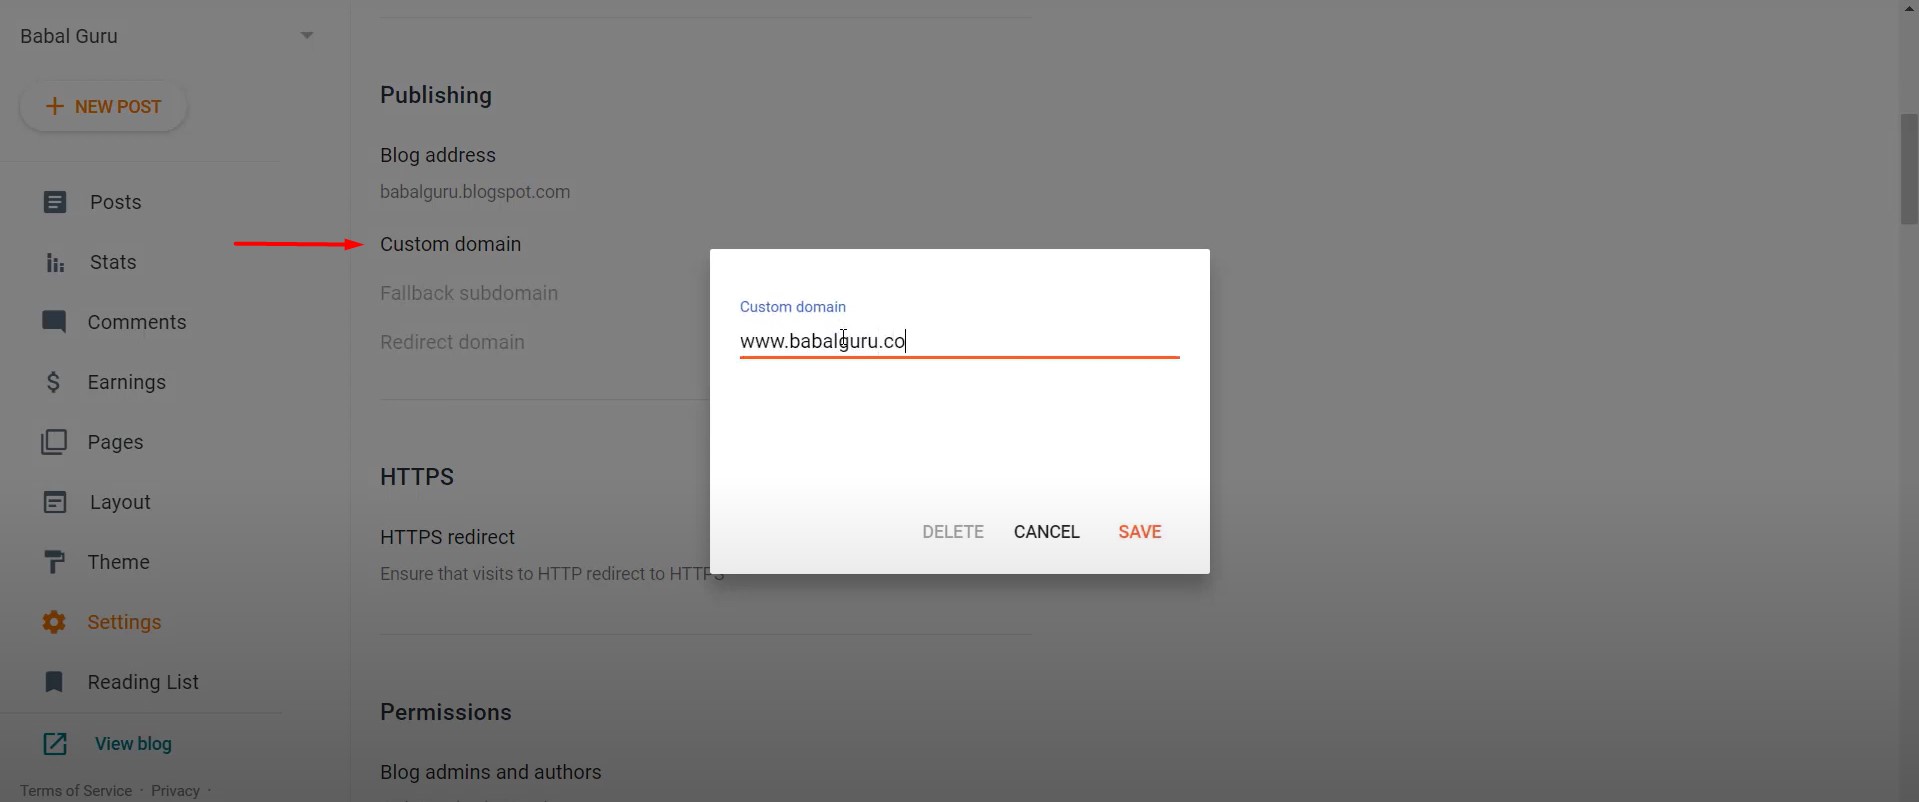
- Locate "Publishing" - click on "Custom Domain" and then enter the domain name you want to connect
For this demonstration purpose we're using "www.babalguru.com"
- You need a second security CNAME record. When you try to register your domain in Blogger, the system should fail and display two security tokens. You'll need to create a second CNAME record to associate the short token (example: ukdsxx7ohscv) to the long token (example: gv-hevdfoqdd3ukx5.dv.googlehosted.com). Note: Changes to DNS records may take up to 48 hours to take effect (but often completes within few hours)

- Once the DNS fully resolves in some hour's time, do return back to it and try saving the settings - the change should be saved normally and you'll see the interface as below once saved:
 Also, check "Redirect domain" such that it's ON. The above screenshot has it at OFF but clicking on it will turn it ON. What this does is redirect the traffic to "www.babalguru.com" for the website
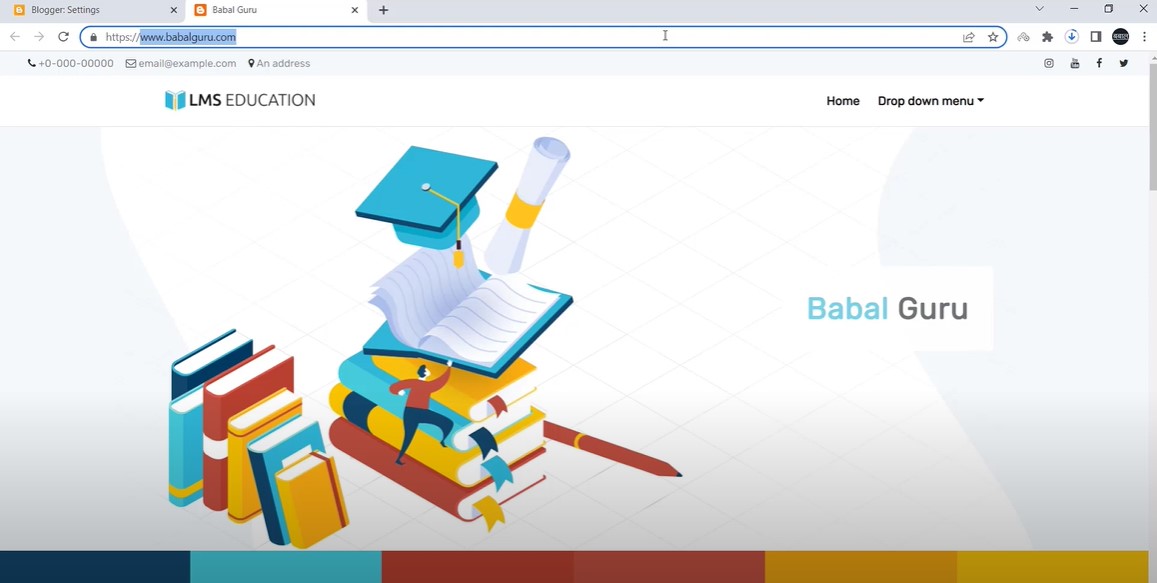
 - Once the DNS resolution is complete from your location - the website loads from the blogger correctly as required - here's a demo of the test environment we have setup: