babal deal
Get unlimited web hosting for just रू 1499/year. Order Now
How to order a web hosting package from Babal Host?
September 13, 2020
6:29 pm
To purchase a new web hosting package or a domain name from Babal.Host - start by first opening your client area. If you're not sure how to login to your client area, please follow, "How to login to Babal Host?" or if you are yet to register an account, please follow, "How to register to Babal Host?"
Video for Ordering hosting package from Babal Host:
Blog for Ordering hosting package from Babal Host:
Once you are in your client area, follow the steps as below:
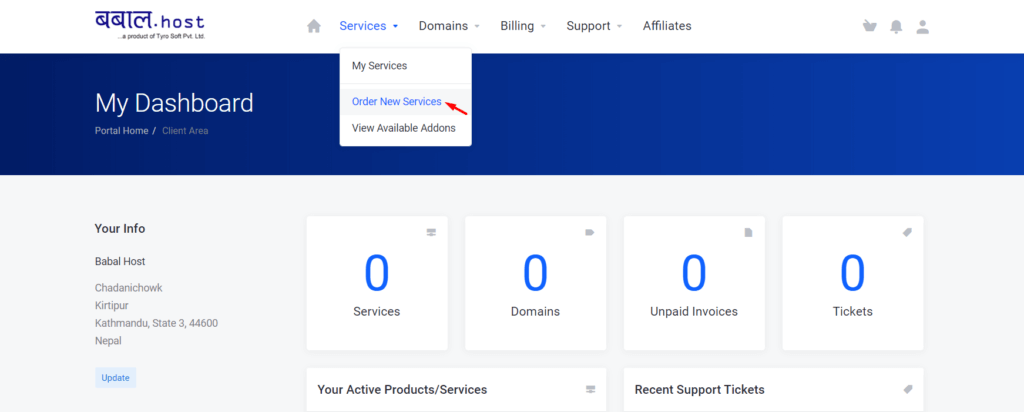
- From the menu bar, click on Services > Order New Services [or open our cart page by clicking on this link: https://clients.babal.host/cart.php]
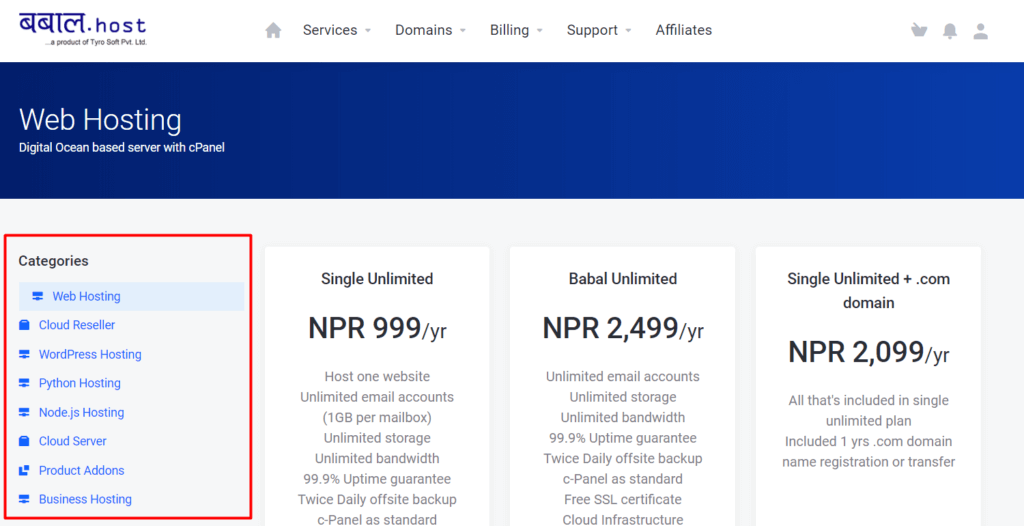
- From the left-hand side categories section - select the package type you want to order. If the package you want to order is already in this page simply click on "Order Now" to move on to the next step
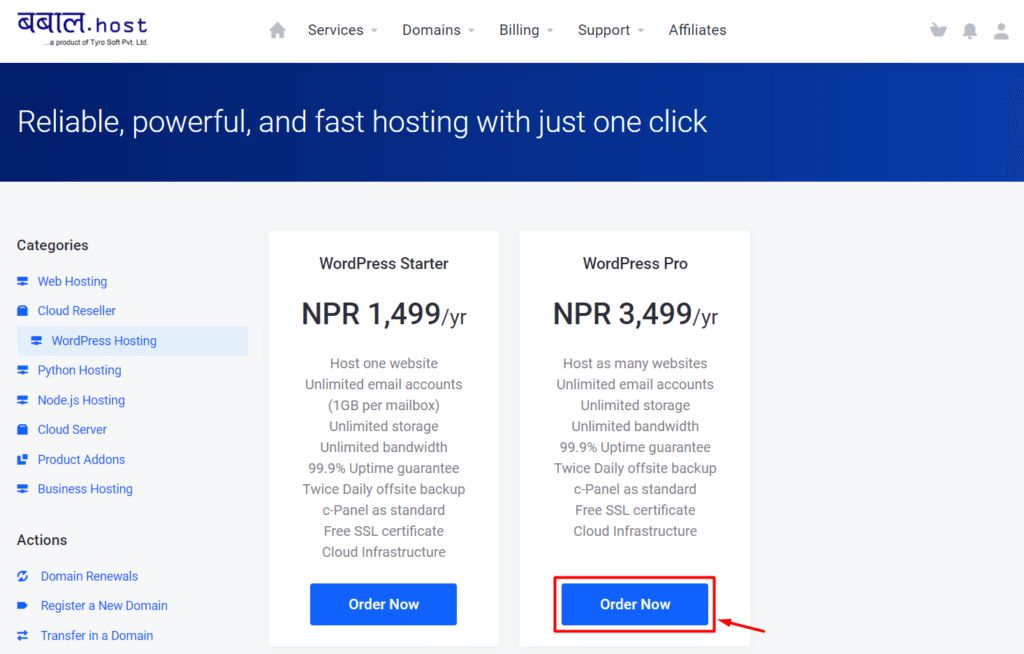
- Consider that I'm looking to order a "WordPress Pro" package then I'll click on the "Order Now" just under that package name
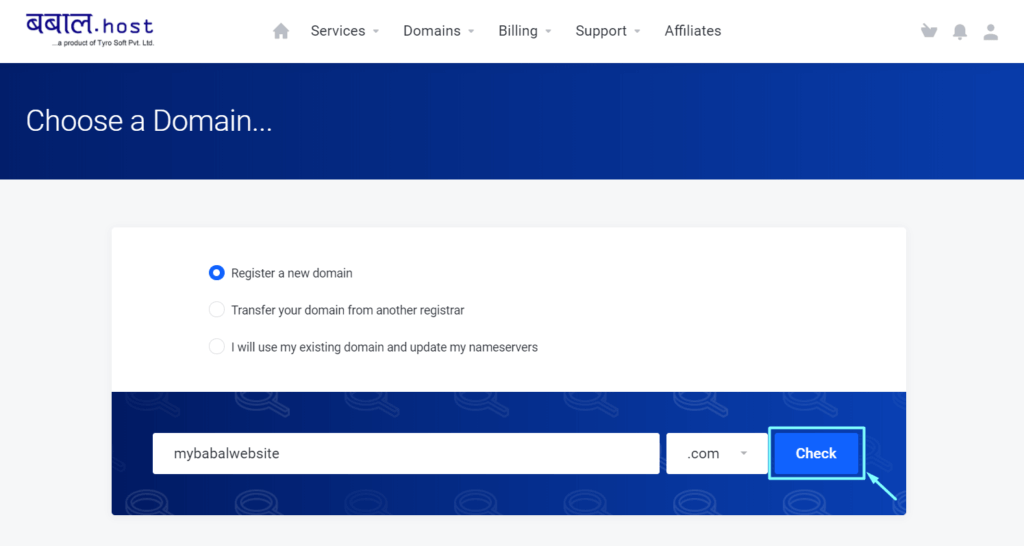
- You will need to select a domain you want to link under the hosting account. There are three options that you can select.First, "Register a new domain" is if you have not yet registered a domain name and would like to register one
Second, "Transfer your domain from another registrar" is if you already have the domain name registered somewhere else but would like to move that domain name to us as well - this process will take 5 full days to complete
Third, "I will use my existing domain and update my nameservers" is if you will like to keep the domain name where it is and will just point the nameservers to ours.
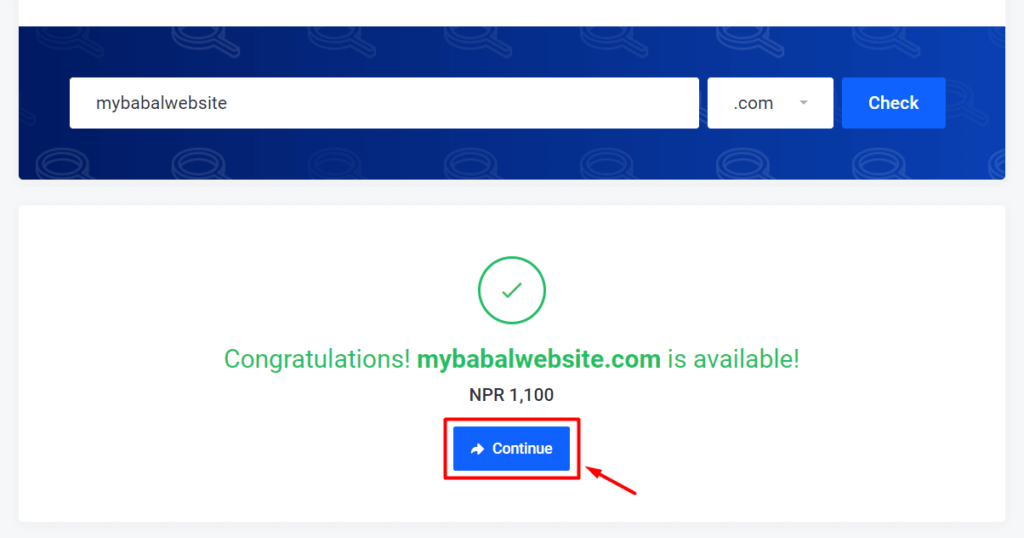
In this blog, I'm showing for the first step i.e. if the domain name wasn't purchased. All domain name needs to be unique - I have entered "mybabalwebsite.com" as my domain name of preference. Clicking on "Check" will show if the domain name is available for purchase or not.
- If the domain is available, click on "Continue" to move to the next step. If it is not available, please continue the search for finding an available domain
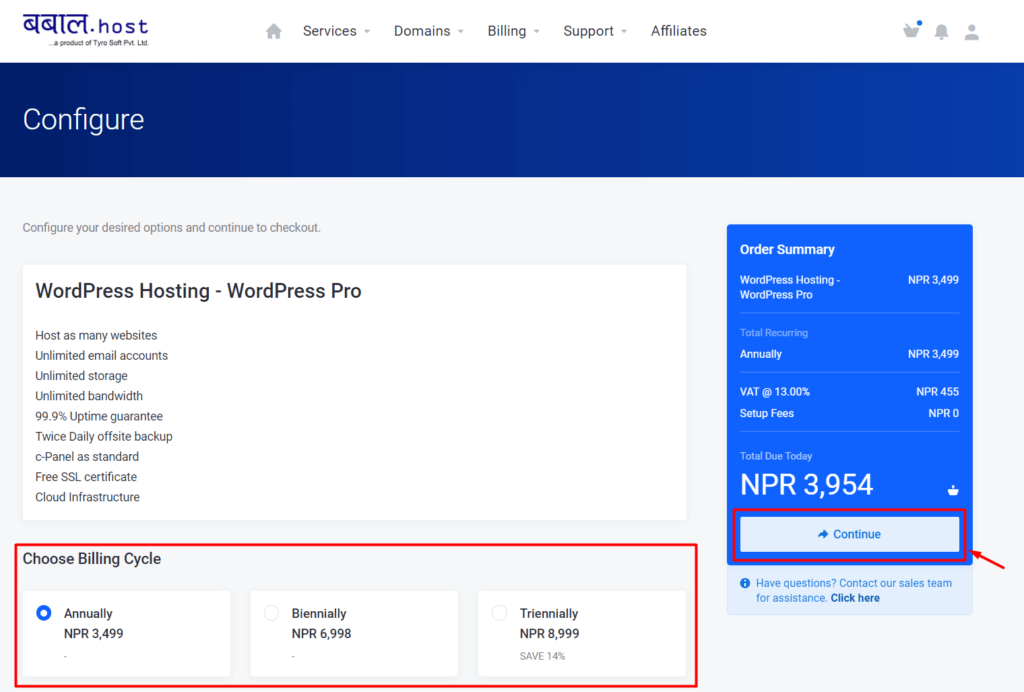
- The next screen will allow you to select the billing duration of your order - you can change it per your liking and then click on "Continue" to move to the next step
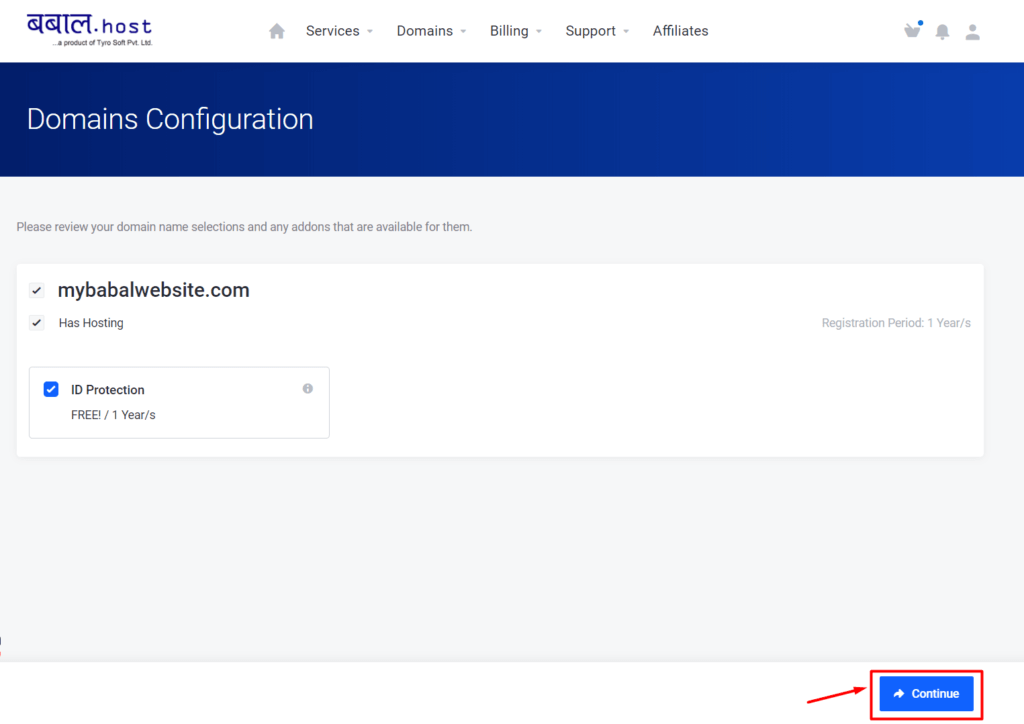
- This step will only be displayed if you selected the first option to register the domain name - you can choose to add "ID Protection" or not for your domain. It helps mask your personal information and helps prevent spam. This is a service many charges a premium fee to have but with Babal Host, we do provide it at no added cost. Once you have selected or decided not to select it - click on "Continue"
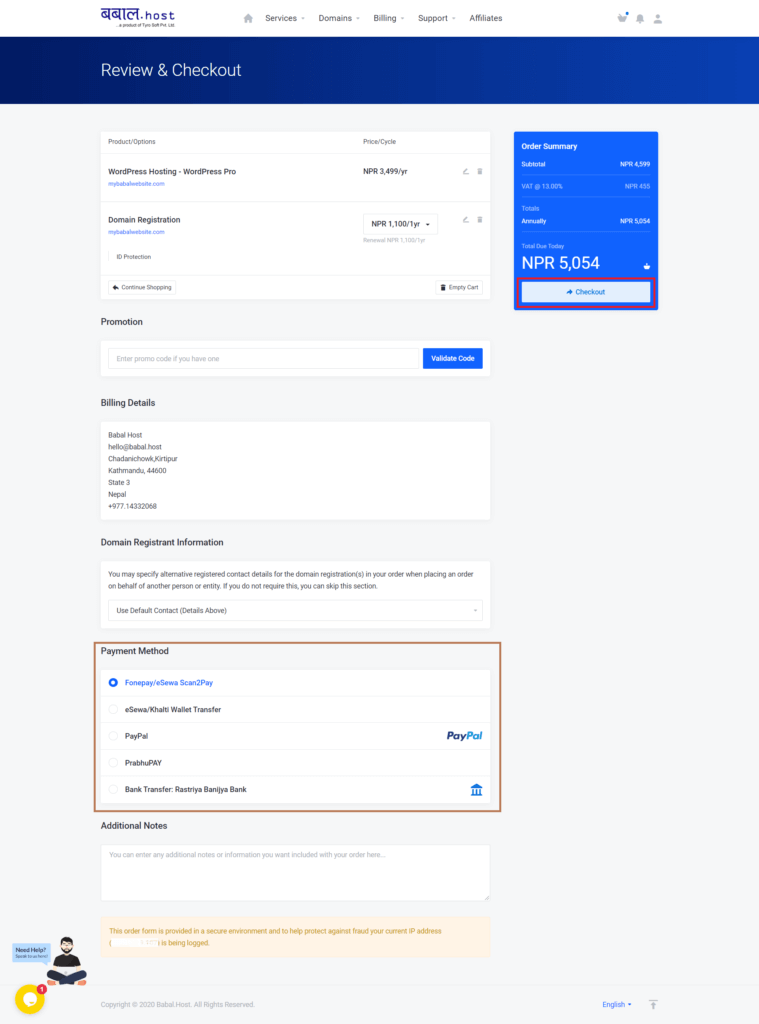
- Review your cart before checking out - select the payment method that you're most comfortable with and then click on "Checkout" to confirm your order
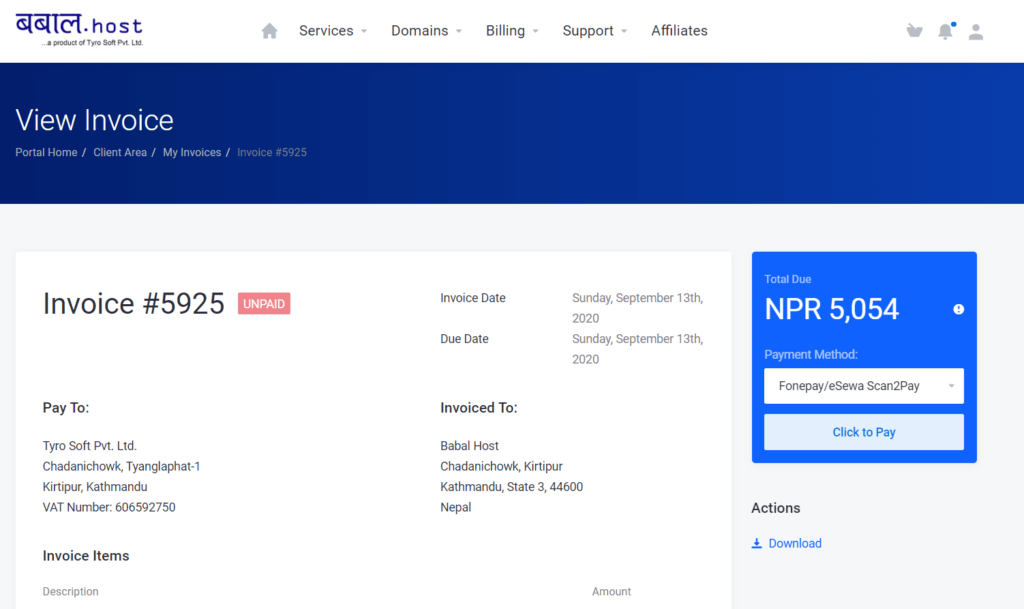
- You will now be directed to your Invoice page - on the right-hand side of the screen, the mode of payment is displayed. Ones with an automated payment module will have a "Click to Pay" option while ones requiring manual payment will display the account within the respective wallet where the funds are to be transferred to activate the service. You can download the invoice by clicking on the "Download" option just under Actions
- Once the invoice is paid - you'll have a payment confirmation message along with the login information being sent in your registered email. You can also find the same details from your client area. To view this from your client area, you can start by clicking on the profile icon (top right corner icon on the client area) and then Email History. The email subject would be "New Hosting Account Information | BabalHost"If you're not sure on how to open your control panel, please follow, "How to open cPanel for your website?"


