babal deal
Get unlimited web hosting for just रू 1499/year. Order Now
How to Restore Your Website from your cPanel?
Babal Host provides standard incremental backup for all your website contents as standard in all our plans, which are stored in an off-site location. To accomplish this we use "JetBackups" as a tool that can be accessed by logging in to your cPanel.
In this article, We cover you about restoring your website from the backups with steps. You can easily restore your backups with one click using JetBackups. We have since disabled "Full Backup" for the account as that doesn't seem compatible for many of our users with either a high file count or high disk usage. So, we recommend using "File Backup" and "Database Backup" to restore the files and database for an account.
Video for Restoring the Website from your cPanel
Blog for Restoring the Website from your cPanel:
Here's the step-by-step instructions for restoring the website from backups for files.
- From cPanel, open JetBackup 5:

- Select the backup type you want to restore - "File Backups" to restore files, "Database Backups" for database, and likewise. As we're first restoring files, we'll start by clicking on "Home Directory"

- You can sort the items based on "Creation Date" to view the most recent or the oldest backup file.
Once you have identified which date you want to restore of - click on "File Manager" next to the date block.
- From the screen that follows, select the files/folder that you want to restore. Here as we're trying to restore for the primary domain - we have selected "public_html" after which we clicked on "Select Files" and "Restore"


-
Once done, the notification appears with the restore summary. Click on "Restore Selected Items" and the restoration will further proceed.

- You can see the following once the backup restoration process is complete:
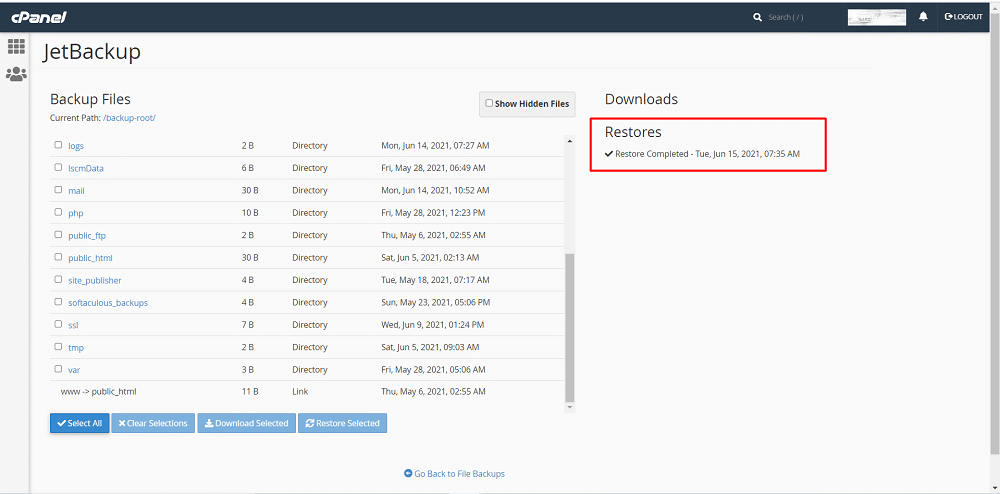
Please note that the time mentioned there are all UTC.
Let's look at how to restore the database now:
- Like in the case of "File Backup" you start from the same location i.e. cPanel > JetBackup
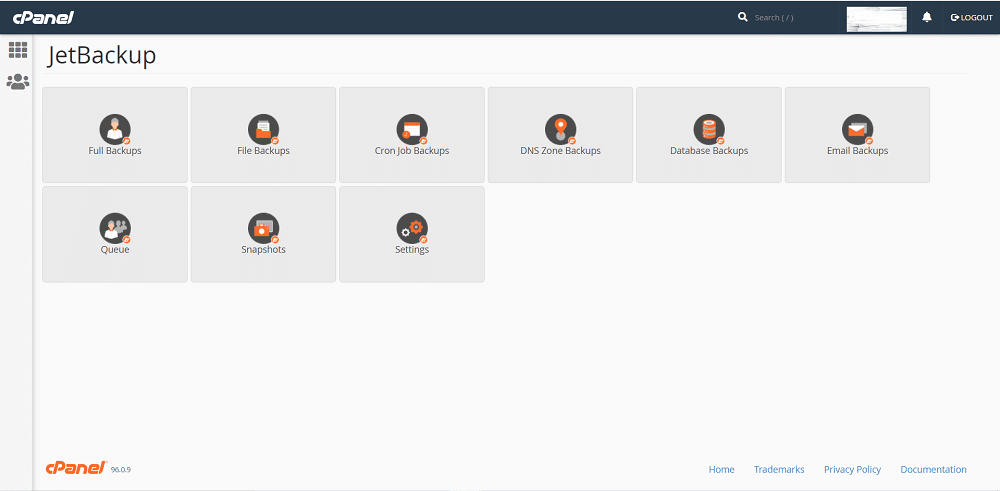
- Click on "Database Backups" - you'll see the following interface (the database names are blurred for security reasons just in the image below - you will see your database names instead):
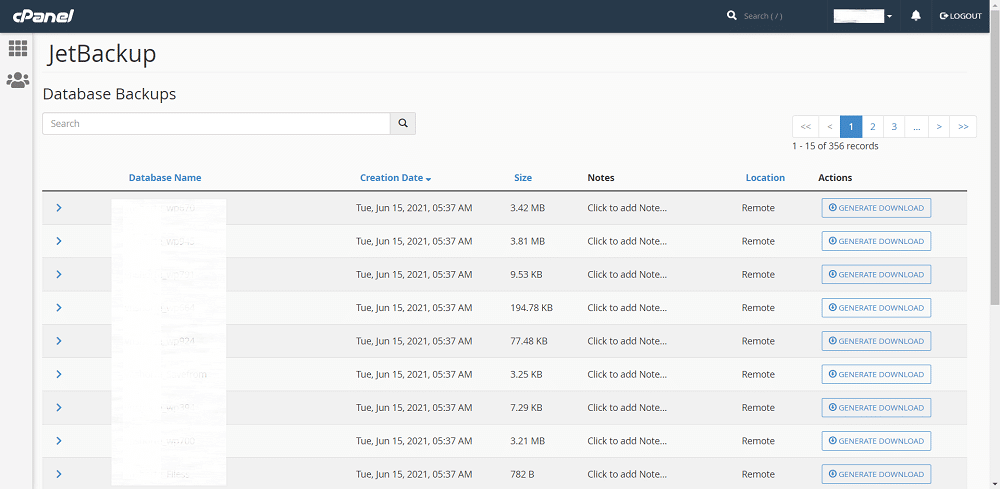
The database backups will also have "Restore Database" option which we have removed for now as we discovered a security loophole with the same. We have already notified JetBackup about it and we will bring it back as the issue is resolved. - Next to the database name and the creation time - click on "Generate Download" for the database of your choice, followed by "Add to Download Queue":
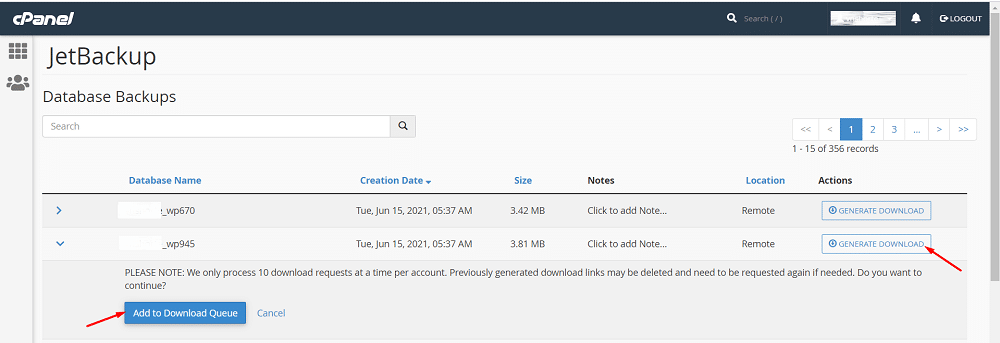
- The database would then be compressed and a download generated - which you can download from the same page as below:

Or, download it from cPanel > JetBackup > Queue - Once the backup is downloaded - you will need to manually upload the same using phpMyAdmin. For this open cPanel > phpMyAdmin:
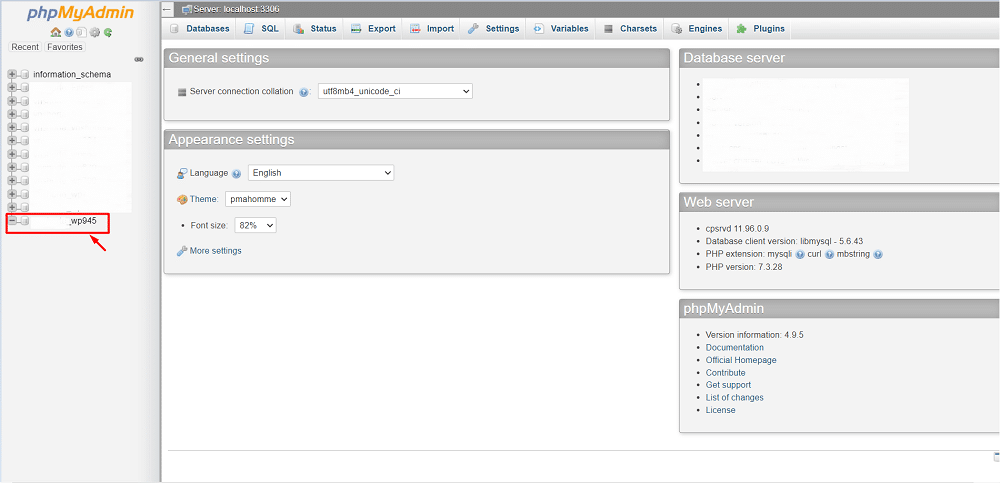
- Click on the database you want to restore for as shown in the above image. In the screen that follow - click on "Import". From the previous JetBackup database download - extract the file and then click on "Choose a File" from the page here. And, select the extracted file:
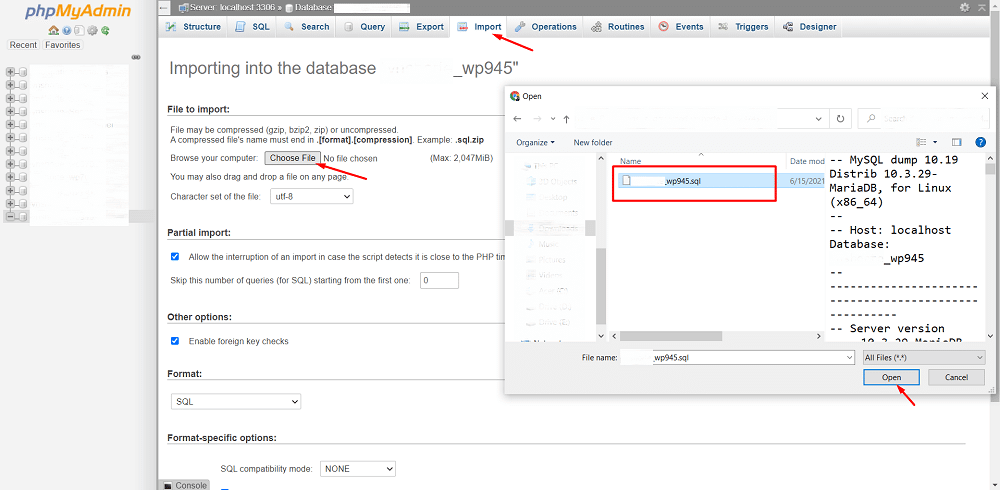
- Click on "Go" at the bottom of the page to start the import process. This can take several minutes to complete based on the size of the file you're looking to import and your internet connection speed.
Once the import is complete - you'll see something like this: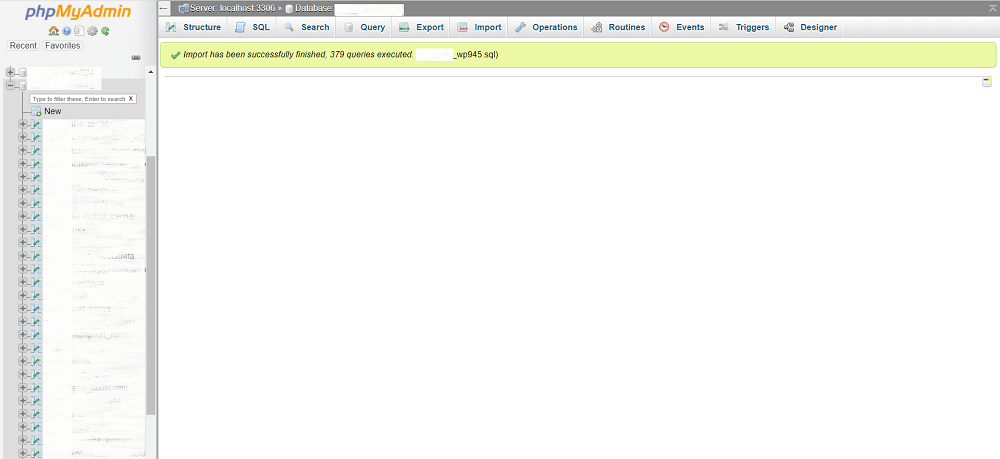
All done. Congratulations! You have successfully imported both the files and database of a select date from your backup successfully.


