babal deal
Get unlimited web hosting for just रू 1499/year. Order Now
How to install SSL certificate in my website?
Babal.Host provides free SSL certificate as a standard in all of our web hosting plans. The SSL certificate is automatically installed within 30 minutes of your domain pointing to our DNS and resolving. To check or install the certificate in case it's not already active, you can do so from your cPanel. Here's how you can do:
Video for installing SSL Certificate:
In Text Details Installing SSL Certificates
- Login to your cPanel either using your username and password using a direct link or from your client area. If you're not sure how to login to cPanel, please follow our article, "How to open cPanel for your website?"
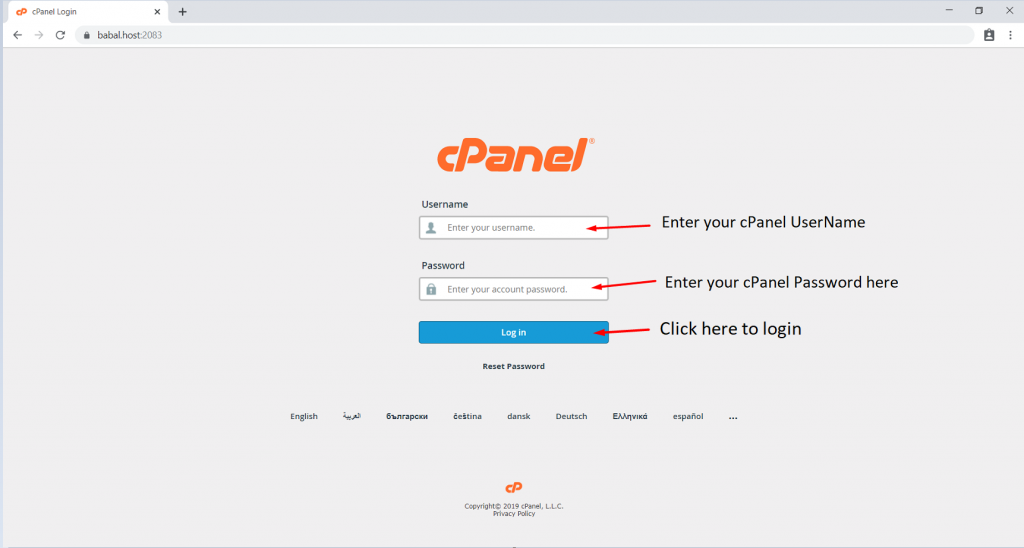
- Once logged in this is a typical screen that you would see:
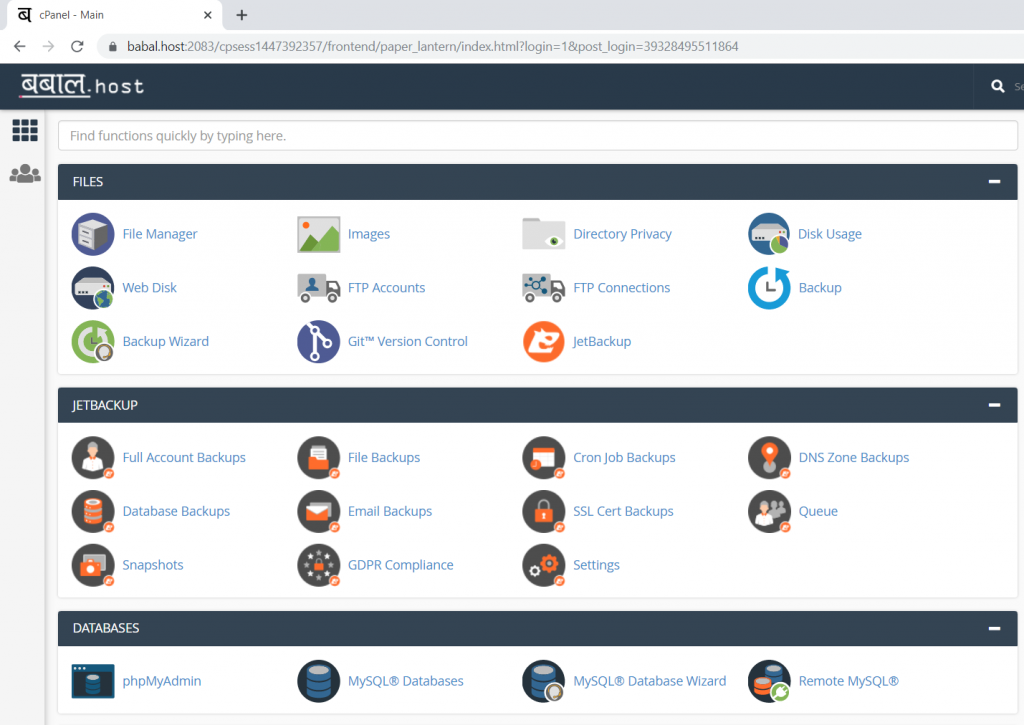
3. Scroll down to "Security" section and click on "SSL/TLS Status"

Or,
Search for "SSL" in the top search bar and click on "SSL/TLS Status" that follows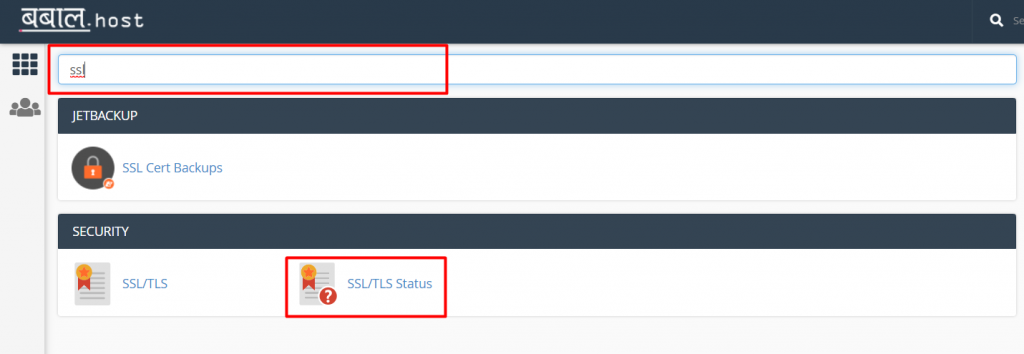
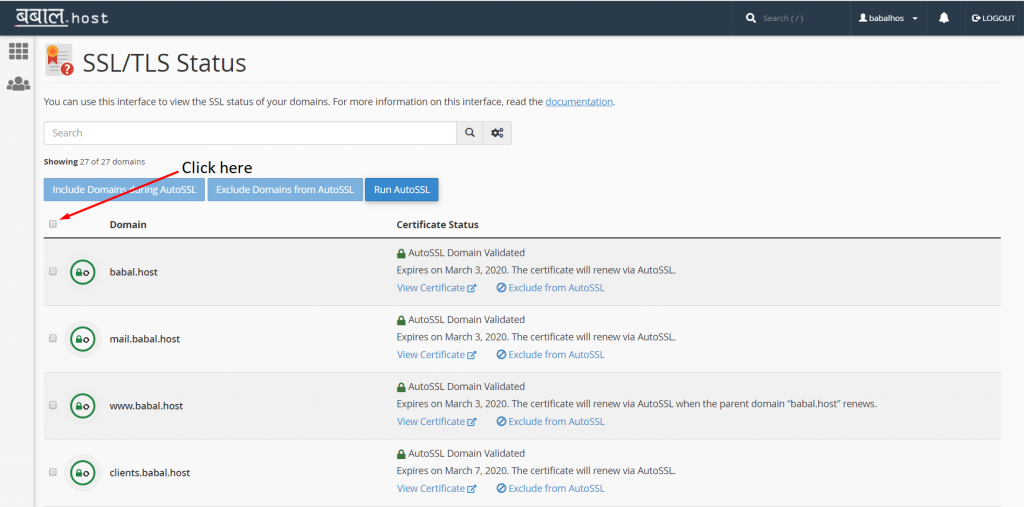
4. In the screen that follows, select all as shown below:
6. Then, click on "Run Auto SSL":
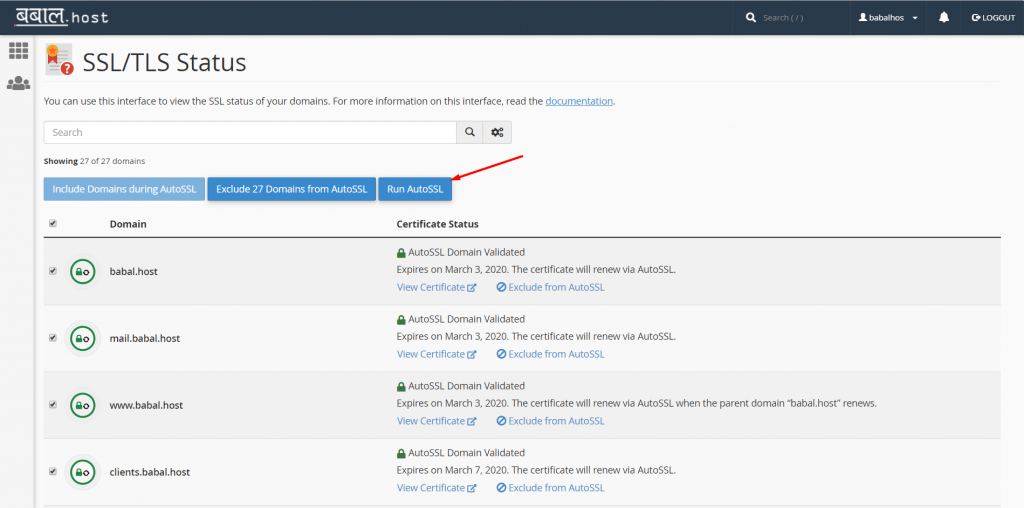
AutoSSL will execute itself and the service will be activated within a few minutes once it completes the check. Please note to have an active SSL certificate, you'll need to have your domain name pointed to our DNS server which are as below:
ns1.babal.host
ns2.babal.host
ns3.babal.host
ns4.babal.host
If you're using any other DNS record including Cloudflare, you can manage the SSL certificate from there.
If you encounter any issues during the process, you can simply open a support ticket from your client area or contact us via any of the other means.


