babal deal
Get unlimited web hosting for just रू 1499/year. Order Now
How to connect your website to Cloudflare?
December 26, 2021
10:04 am
Cloudflare is a free CDN that can be accessed through (Cloudflare) here. It protects through identity threats as well as SQL injection. It also speeds up the website performance and improves site loading speed through its different datacenters across the world. Let us follow the following steps to connect your Babal Website to Cloudflare.
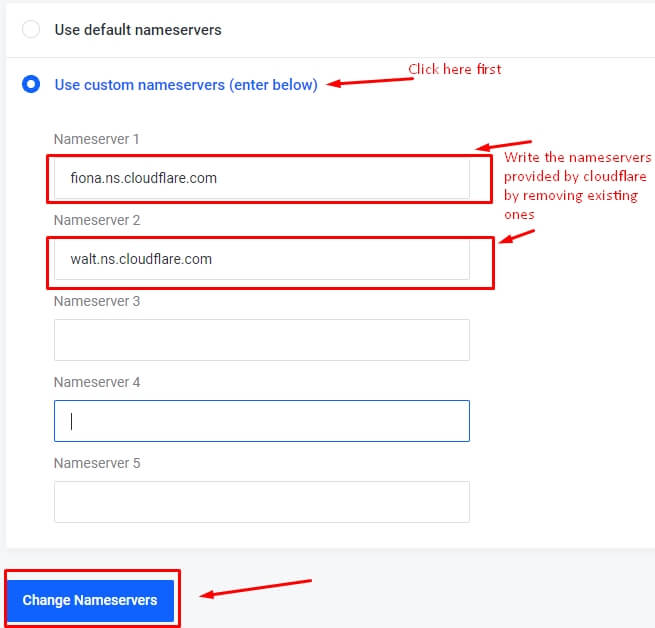
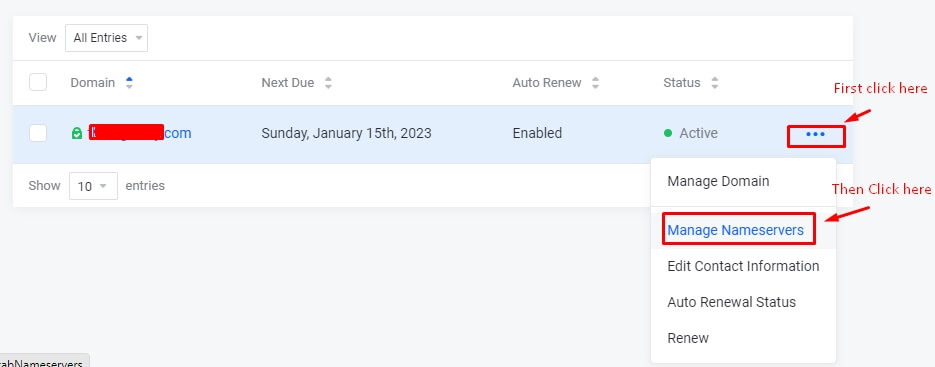 v) Click on custom nameservers then Add the nameservers provided by Cloudflare and click on the "Change Nameservers" button.
 Congratulations! You have successfully added your domain to your Cloudflare. It will take some time for records to fully solve around the world.
-
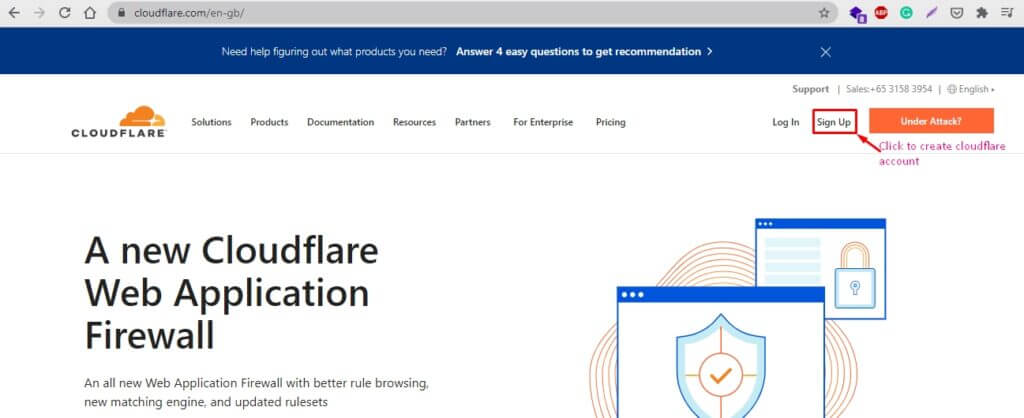
- Open Cloudflare Website from this link (Link: https://www.cloudflare.com/ and click on the Sign Up button to create an account at Cloudflare. If you already have an account in Cloudflare then go directly to step 3.
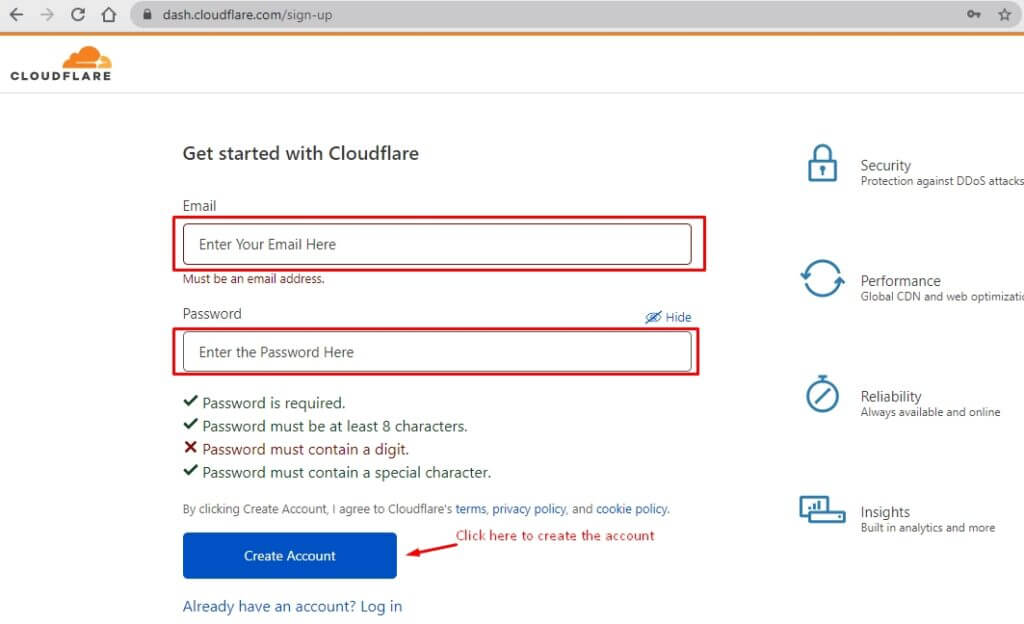
- Enter your Email and Password to create the Cloudflare account. And Click on Create Account Button.
- Enter your Email and Password and Click on Login Button.

- After logging in, the Dashboard/Homepage of Cloudflare Opens. Click on Add a site Button.

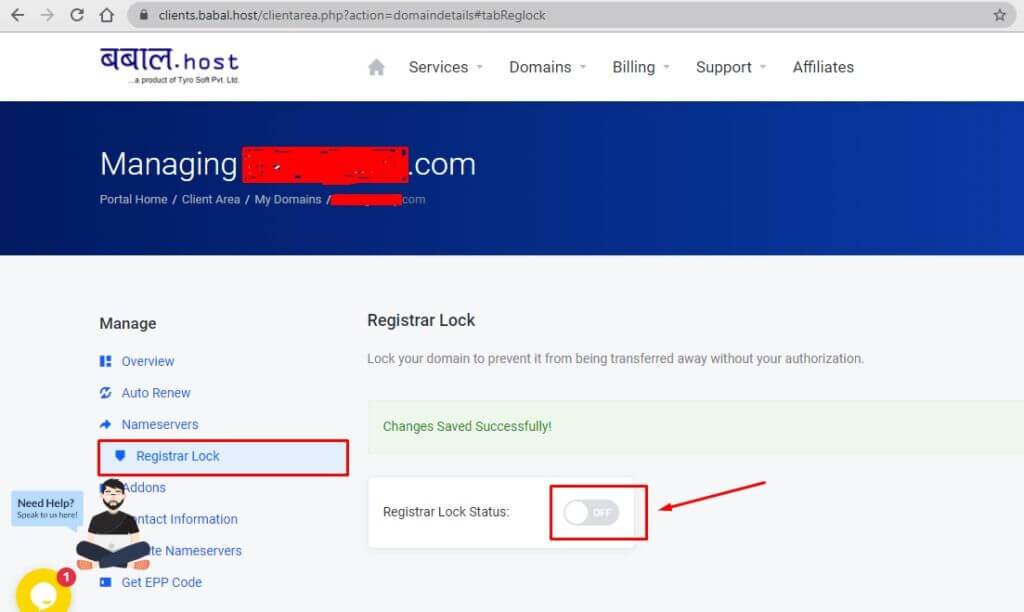
- Before adding a website, Login to the client area and then domains and set the registrar lock off to the domain.
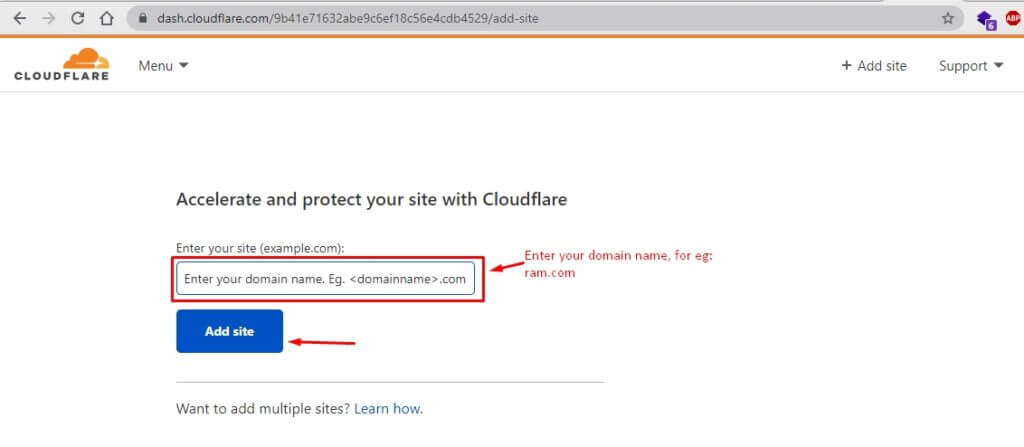
- Enter your website name and click on Add a site button. Let the domain name be anything you own just like if you have a domain name then type <yourdomainname>.com
- Select your plan and click on Continue.

- Now you will see the following screen, see the DNS records and also review with one of the cPanel. Add the records to Cloudflare. First open the cPanel, to open the cPanel follow the following article, How to open cPanel for the website?

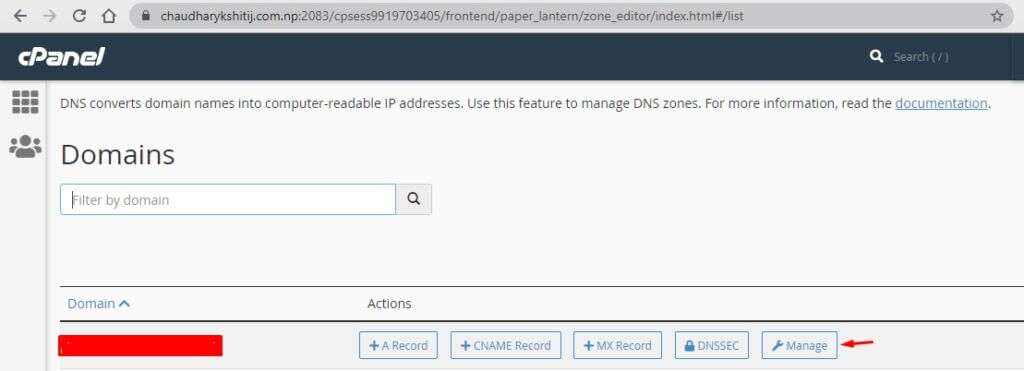
- Leave as it is, open cPanel, and go to Zone Editor in the cPanel.

- Click on Manage.
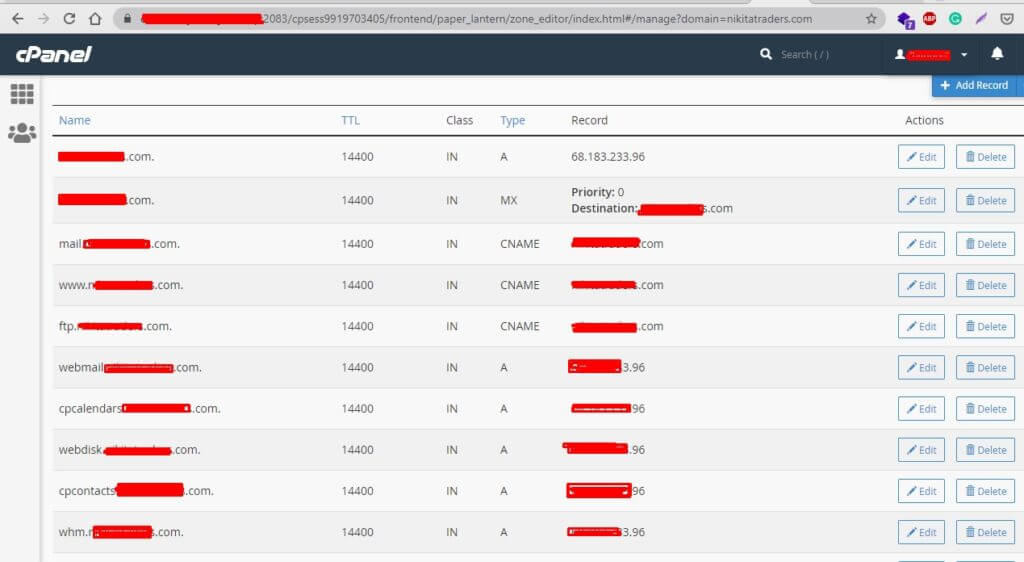
- See the A records, CName record, Mx record, TXT records of cPanel and set the value of same to the Cloudflare DNS records, as shown on step 8 above. If the records are same, then you don't need to change it. Directly go back to step 8, and click on continue.
 In the figure of step 8, click on continue after setting the A, MX, CNAME records.

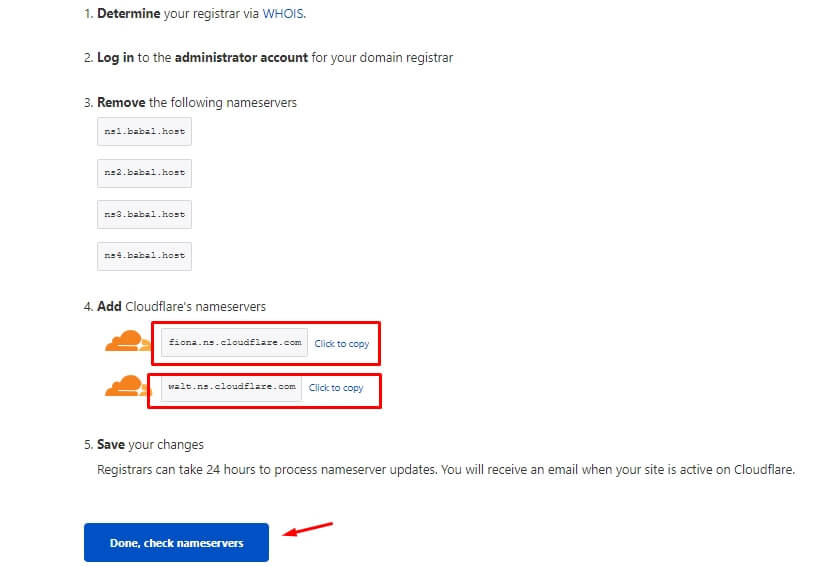
- Change the nameservers, and set the nameservers provided by Cloudflare. In this case, the nameservers provided by Cloudflare are:
fiona.ns.cloudflare.com
walt.ns.cloudflare.com
After changing the nameservers, click on Done, Check Nameservers and now you have done. Registrars can take 24 hours to process nameserver updates. You will receive an email when your site is active on Cloudflare.
- Open Cloudflare Website from this link (Link: https://www.cloudflare.com/ and click on the Sign Up button to create an account at Cloudflare. If you already have an account in Cloudflare then go directly to step 3.
 v) Click on custom nameservers then Add the nameservers provided by Cloudflare and click on the "Change Nameservers" button.
 Congratulations! You have successfully added your domain to your Cloudflare. It will take some time for records to fully solve around the world.

