babal deal
Get unlimited web hosting for just रू 1499/year. Order Now
How to fix 403 error after successful login to WordPress dashboard?
September 14, 2020
12:50 pm
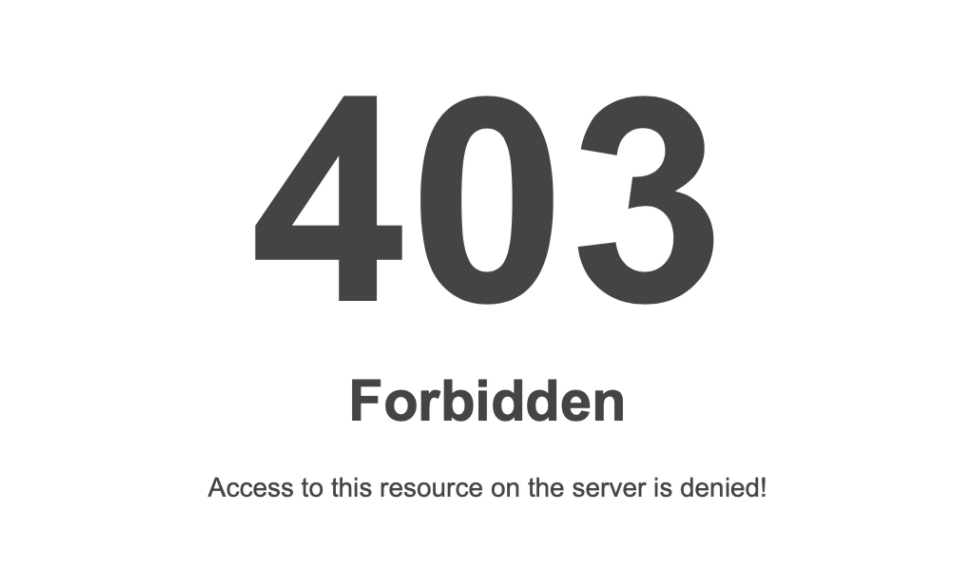
Logged in to your WordPress website successfully to only discover a "403 error" page unable to login. If this is you, please read further on how to fix and what causes the problem.
 Let's understand what causes the issue first
403 error means that you do not have access to the resource you're trying to load and thus you're not allowed to open. "But, hey! this is my WordPress dashboard and if I'm not able to, who can?" might be the question going on in your head. And, you're right to have that question.
In most cases, the system is detecting suspicious activity from the IP you're using and it is likely that it's blacklisted. You can check if your IP is blacklisted by visiting the site here. To know which IP you're using visit here. This is one of the protective layers of the server and thus restricts you to access sensitive resources.
Internet Service Providers (ISP) are responsible for the IP that they provide to their users and it is also not recommended to access the internet with a heavily blacklisted IP address and yet that does not stop ISPs to lease those to their customers. The IPs are blacklisted for their suspicious activities or involvement in actions like an attempt to hack, spreading spam, sending multiple invalid requests like multiple failed login attempts, and many others.
Ok, Ok, tell me how to fix it now
To fix this, you'll have to bring down a wall from cPanel and build another in WordPress. Let me explain exactly what I mean in the steps below:
- Login to your cPanel. If you're not sure how to, read "How to open cPanel for your website?"
- From cPanel - locate "ModSecurity" under the "Security" section and click on it

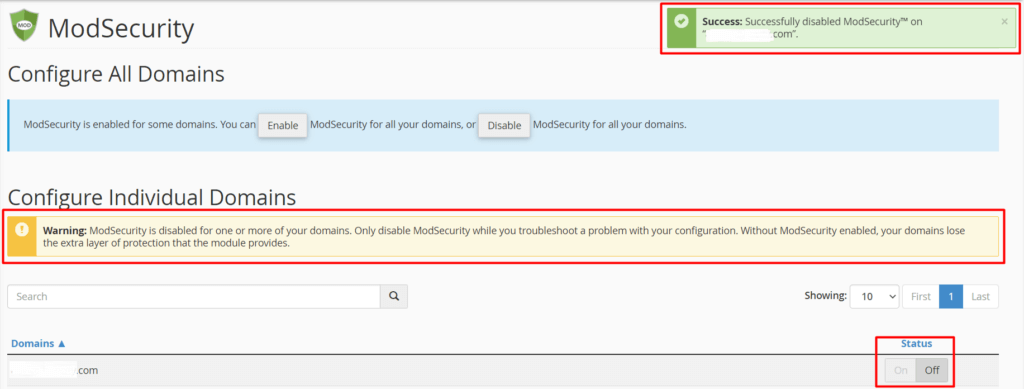
- If you want to disable the security for the entire cPanel click on "Disable" at the very top. However, if you just want to disable it for a specific domain, click on the corresponding switch under "Status" and mark it as off.
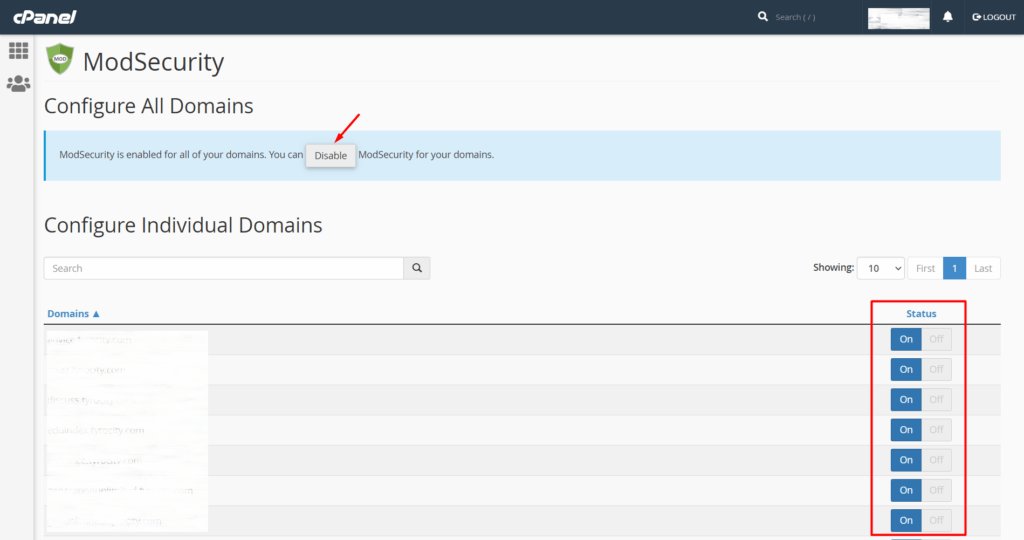
- Once you click on either of the option to disable the security, you'll see a warning and a success message in your screen as below
- With a layer of security removed, you should be able to login to your WordPress dashboard successfully. Do not try refreshing the same page but rather close the window and reopen to login. ModSecurity is a web application firewall that prevents a certain type of attack, keeping your website safe. It runs on websites individually (when enabled) and examines the traffic based on a set of rules provided by the vendor that is chosen by the system administrator. On our servers the ModSecurity vendor is Imunify360. Taking a layer of security down - you've made your website vulnerable so from your dashboard you can add a replacement for the same. This is not required but recommended if you want to ensure the security of your website.
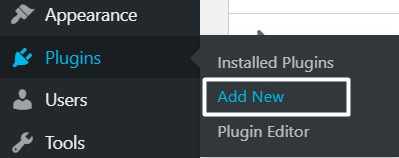
- Now, from your WordPress dashboard - hover on "Plugins" and click on "Add New"
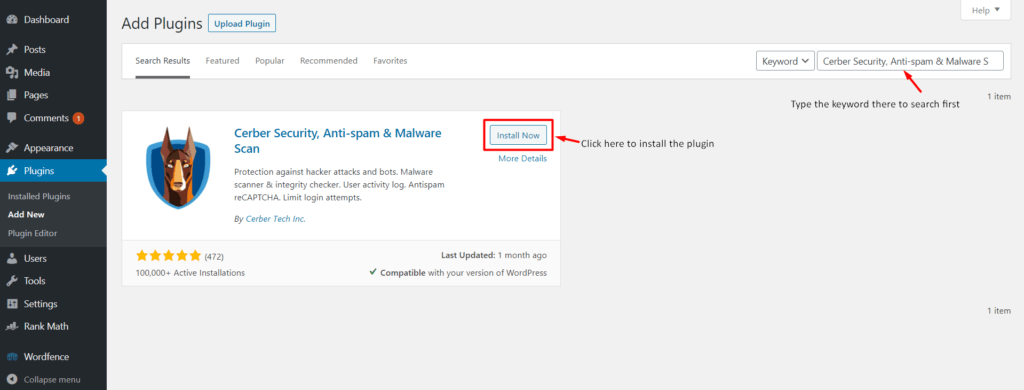
- Search for "Cerber Security, Anti-spam & Malware Scan" in the search bar and press enter. Click on "Install Now" thereafter
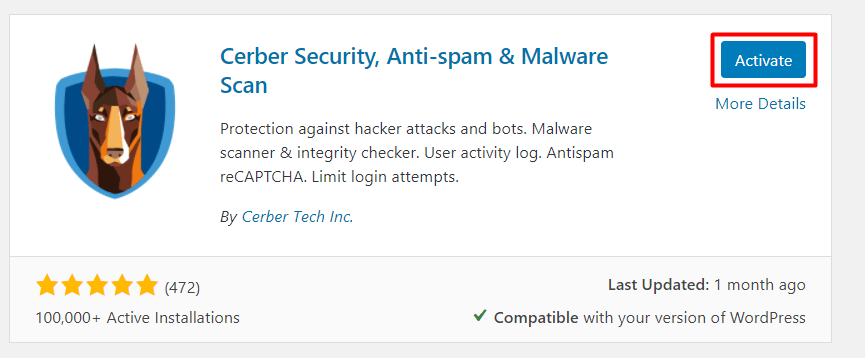
- Once the plugin is installed, click on "Activate"
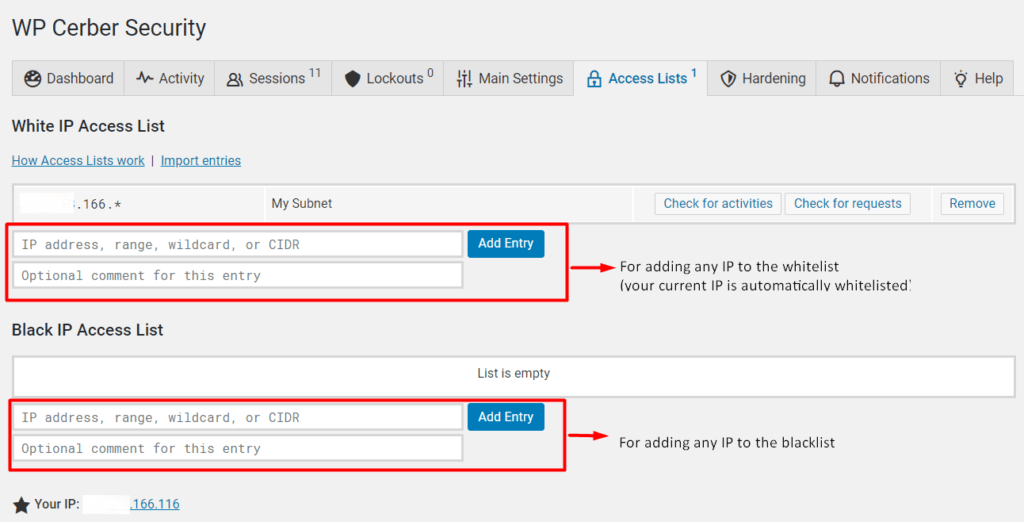
- Your current active IP is automatically whitelisted by the plugin. Congratulations! You have successfully configured a replacement security system for your website. This is the end of the article if you do not want to add any more IP to the whitelist or blacklist.
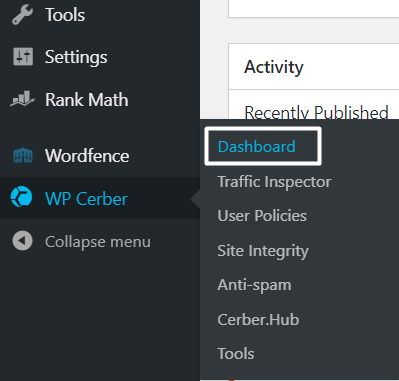
- If you want to add any more IPs to the whitelist - hover on "WP Ceber" and then click on "Dashboard" from the menu bar on the left.
- From the dashboard, click on "Access Lists"
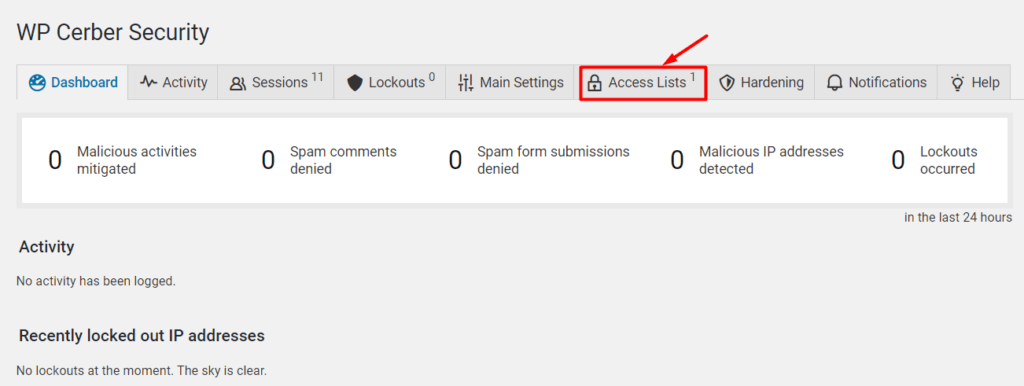
- You can add any IP you desire to whitelist or blacklist as shown in the image below. Please note your IP subnet is automatically added to the whitelist so no further actions would be required for that.
